SVG 研究之路 (15) - filter - feComponentTransfer

feComponentTransfer 是針對圖像中每一個像素,利用公式的計算,進行亮度、對比...等調整,其實就有點類似 Photoshop 裏頭的「曲線」調整模式,我們可以利用調整線條的斜率、或是曲線的公式,對圖片進行更細緻的調整,只是在 photoshop 裏頭已經幫我們做了視覺介面的處理,在 SVG 裏頭則是必須要自己手動輸入相關數值。
feComponentTransfer 元素與 type
feComponentTransfer 包含四個元素,分別是:feFuncR、feFuncG、feFuncB、feFuncA,也就是可以針對紅綠藍與 alpha 色版進行獨立調整,調整的 type 分為五種,分別是:identity、table、discrete、linear、gamma,五種調整 type 的對照公式可以參考 W3C 的詳細說明,也可以參考 這篇文章,介紹的更是詳細。
首先看到 table,table 屬性主要是將我們所輸入的區塊,重新填入原本對照的色彩梯度區塊當中 ( 如下圖 ),就可以產生不同色彩梯度的效果。
![]()
我們也可以利用 table 屬性來讓一張圖片有不同風格的變化 :
<svg width="300" height="500">
  <defs>
    <filter id="table" filterUnits="userSpaceOnUse" x="0" y="200" width="300" height="200">
      <feComponentTransfer>
        <feFuncR type="table" tableValues="0.0 0.7 0.9 1.0"/>
        <feFuncG type="table" tableValues=".2 0.7 0.9 1.0"/>
        <feFuncB type="table" tableValues=".2 0.7 0.9 1.0"/>
      </feComponentTransfer>
    </filter>
  </defs>
  <image x="0" y="0" width="300" height="200" xlink:href="圖片網址" />
  <image x="0" y="200" width="300" height="200" xlink:href="圖片網址" filter="url(#table)"  />
</svg>
![]()
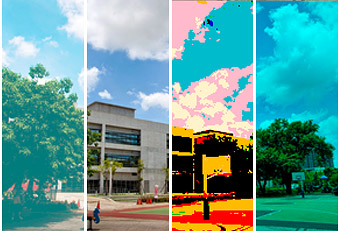
再來看到 discrete,從字面翻譯就是「離散」,也就是當我們列出一個數字的陣列,就會採用這個陣列的數字直接填入該色彩梯度內,造成沒有漸層的情形,如下圖:
![]()
也因為少了很多顏色,所產生的圖片效果也頗特殊的:
<svg width="300" height="500">
  <defs>
    <filter id="discrete" filterUnits="userSpaceOnUse" x="0" y="200" width="300" height="200">
      <feComponentTransfer>
        <feFuncR type="discrete" tableValues="0.0 1.0 1.0 1.0"/>
        <feFuncG type="discrete" tableValues="0.0 0.5 0.5 0.9"/>
        <feFuncB type="discrete" tableValues="0.0 0.6"/>
      </feComponentTransfer>
    </filter>
  </defs>
  <image x="0" y="0" width="300" height="200" xlink:href="圖片網址" />
  <image x="0" y="200" width="300" height="200" xlink:href="圖片網址" filter="url(#discrete)"  />
</svg>
![]()
至於 linear 和 gamma 就簡單多了,linear 就是調整直線的斜率,和 linear 有關的參數有兩個,一個是 slope,也就斜率,預設值為 1,另外一個是 intercept,預設值為 0 ( linear 的公式為:C' = slope * C + intercept ) 了解了之後,我們就可以很輕鬆的對漸層當中的顏色作調整
<svg width="8cm" height="100%" viewBox="0 0 800 800">
    <linearGradient id="MyGradient" gradientUnits="userSpaceOnUse"
            x1="100" y1="0" x2="600" y2="0">
      <stop offset="0" stop-color="#000000" />
      <stop offset=".3" stop-color="#00ff00" />
      <stop offset=".6" stop-color="#0000ff" />
      <stop offset="1" stop-color="#ff0000" />
    </linearGradient>
    <filter id="Linear" filterUnits="objectBoundingBox"
            x="0%" y="0%" width="100%" height="100%">
      <feComponentTransfer>
        <feFuncR type="linear" slope="0" intercept="0"/>
        <feFuncG type="linear" slope="0" intercept="0"/>
        <feFuncB type="linear" slope="1" intercept="0"/>
      </feComponentTransfer>
    </filter>
  </defs>
    <rect x="100" y="420" width="600" height="60" fill="url(#MyGradient)" />
    <rect x="100" y="490" width="600" height="60" fill="url(#MyGradient)" filter="url(#Linear)" />
</svg>
![]()
<svg width="300" height="500">
  <defs>
    <filter id="Linear" filterUnits="objectBoundingBox" x="0%" y="0%" width="100%" height="100%">
      <feComponentTransfer>
        <feFuncR type="linear" slope="0" intercept="0"/>
        <feFuncG type="linear" slope="1" intercept="0"/>
        <feFuncB type="linear" slope="1" intercept="0"/>
      </feComponentTransfer>
    </filter>
  </defs>
  <image x="0" y="0" width="300" height="200" xlink:href="圖片網址" />
  <image x="0" y="200" width="300" height="200" xlink:href="圖片網址" filter="url(#Linear)"  />
</svg>
![]()
最後是 gamma ,gamma 就是調整指數曲線的數值,與 photoshop 裏頭調整圖片曲線有異曲同工之妙,當然還是必須得手動輸入一些數值就是了,gamma 的公式為:C' = amplitude * pow(C, exponent) + offset,因此就具有三個參數:amplitude、exponent、offset。
<svg width="8cm" height="100%" viewBox="0 0 800 800">
    <linearGradient id="MyGradient" gradientUnits="userSpaceOnUse"
            x1="100" y1="0" x2="600" y2="0">
      <stop offset="0" stop-color="#000000" />
      <stop offset=".3" stop-color="#00ff00" />
      <stop offset=".6" stop-color="#0000ff" />
      <stop offset="1" stop-color="#ff0000" />
    </linearGradient>
    <filter id="Gamma" filterUnits="objectBoundingBox"
            x="0%" y="0%" width="100%" height="100%">
      <feComponentTransfer>
        <feFuncR type="gamma" amplitude="2" exponent="5" offset="0"/>
        <feFuncG type="gamma" amplitude="2" exponent="3" offset="0"/>
        <feFuncB type="gamma" amplitude="2" exponent="1" offset="0"/>
      </feComponentTransfer>
    </filter>
  </defs>
    <rect x="100" y="420" width="600" height="60" fill="url(#MyGradient)" />
    <rect x="100" y="490" width="600" height="60" fill="url(#MyGradient)" filter="url(#Gamma)" />
</svg>
![]()
![]()
<svg width="300" height="500">
  <defs>
    <filter id="Gamma" filterUnits="objectBoundingBox" x="0%" y="0%" width="100%" height="100%">
      <feComponentTransfer>
      <feFuncR type="gamma" amplitude="2" exponent="5" offset="0"/>
      <feFuncG type="gamma" amplitude="2" exponent="3" offset="0"/>
      <feFuncB type="gamma" amplitude="2" exponent="1" offset="0"/>
      </feComponentTransfer>
    </filter>
  </defs>
  <image x="0" y="0" width="300" height="200" xlink:href="圖片網址" />
  <image x="0" y="200" width="300" height="200" xlink:href="圖片網址" filter="url(#Gamma)"  />
</svg>
![]()
小結
了解了 feComponentTransfer 的基本原理之後,其實就已經可以簡單地針對圖片做顏色上的調整囉!雖然我還是覺得直接用影像處理軟體調整比較實在,不過若要製作一個線上調整圖片顏色的工具,也不失為一個好方式。